Tired of paying monthly subscription fees just to access your own security camera footage? You’re not alone. The cloud subscription model has taken over the smart home industry, locking down access to your recordings behind a paywall. But there is a better way. With some affordable hardware and powerful Free DVR Software, you can build a DIY Home Security system that gives you complete control.
In this comprehensive iSpy Tutorial, we will teach you how to save money and increase your privacy by pairing the free, open-source iSpy application with affordable, high-quality Tapo cameras.
Why Local Hosting is Better Than Cloud Subscriptions
Hosting your own camera feeds locally comes with three massive benefits:
- No Monthly Fees: You buy the hardware once and never pay a subscription fee.
- Ultimate Privacy: Cloud hacks happen. By recording your Local Security Footage to a local drive, you ensure that no one else can view your daily activity without physical access to your network.
- Instant Access: No buffering or internet delays when retrieving footage. You stream locally at lightning speeds.
Our Top Camera Recommendations
To get started with our Tapo Camera Setup, you need the right hardware. Here are our top Tapo picks that work flawlessly with iSpy:
- Tapo C210 (Indoor): 2K resolution, affordable, and features pan/tilt capabilities. Perfect for living rooms.
- Tapo C120 (Indoor/Outdoor): Weatherproof with a powerful magnetic mount. Super versatile.
- Tapo C720 (Floodlight): A highly recommended wired option, best for driveways and main entry points.
Shop more options here and check compatibility for iSpy here.
Step 1: Setting up a Camera Account in the Tapo App
Before iSpy can connect to your camera, you need to enable local network access via the Tapo app. Out of the box, Tapo keeps things secure by requiring you to explicitly create local credentials.
Creating the Local Account
- Open the Tapo app and navigate to your camera's live view.
- Tap the Settings (gear icon) in the top right corner.
- Go to Advanced Settings -> Device Account.
- Create a username (e.g.,
ispyuser) and a strong password. Save these credentials, as you'll need them later.
Step 2: Assigning a Static IP Address in the Tapo App
Why is a Static IP vital for a stable connection? Your router assigns temporary IP addresses to devices. If your camera reboots, it might get a new IP address, which will break your connection in iSpy. A static IP ensures the address never changes.
Configuring the Camera IP
- Still inside the Tapo app camera settings, navigate to Network Connection.
- Toggle off the Auto (DHCP) setting to manually assign an IP.
- Set a permanent Static IP address for your camera (e.g.,
192.168.1.50). - Note down this IP address exactly as it appears.
Step 3: Adding the Camera to iSpy
Now that your camera is prepped upon your network, it's time to connect it to your central hub in Agent DVR (iSpy).
Connecting via RTSP
- 1. Open the iSpy application in your web browser.
- 2. Click the Server Icon or the Edit (Pencil) Icon in the top menu bar to add a new device.
- 3. Select Video Source and choose Network Camera.
-
4. In the Network Source fields, enter the RTSP link using the
static IP you created and the standard 554 port:
rtsp://your.static.ip.here:554/. - 5. Enter the Local Device Account username and password you created in Step 1.
- 6. Adjust your Recording settings under the Recording tab to set your preferred detection modes.
- 7. Click OK to save your camera.
- 8. To view any recordings, select the camera dropdown in the top left and select Recordings to browse all saved footage.

Top Toolbar — Edit (Pencil) Icon
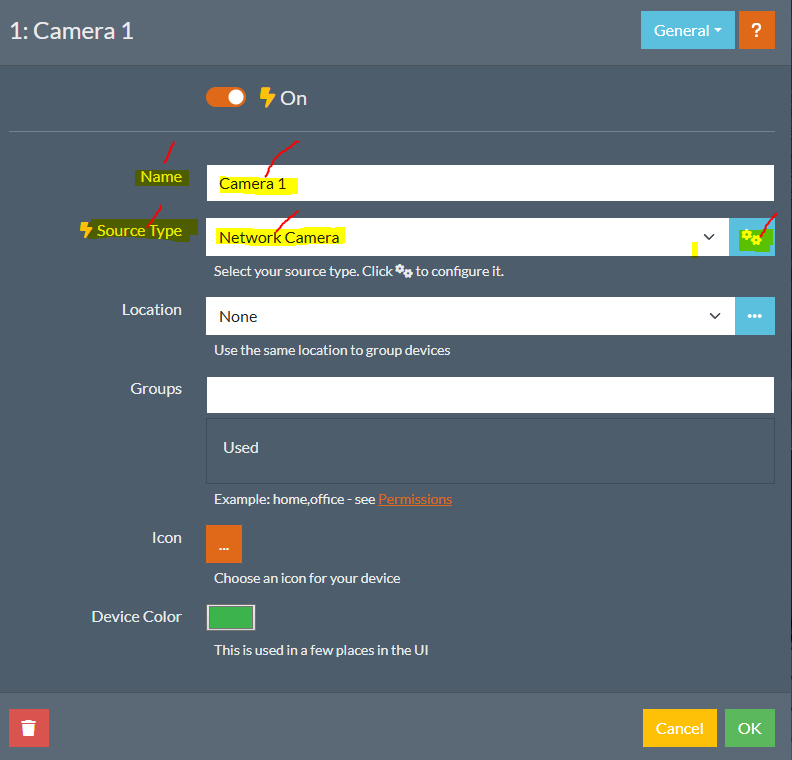
Camera General Tab — Select Network Camera
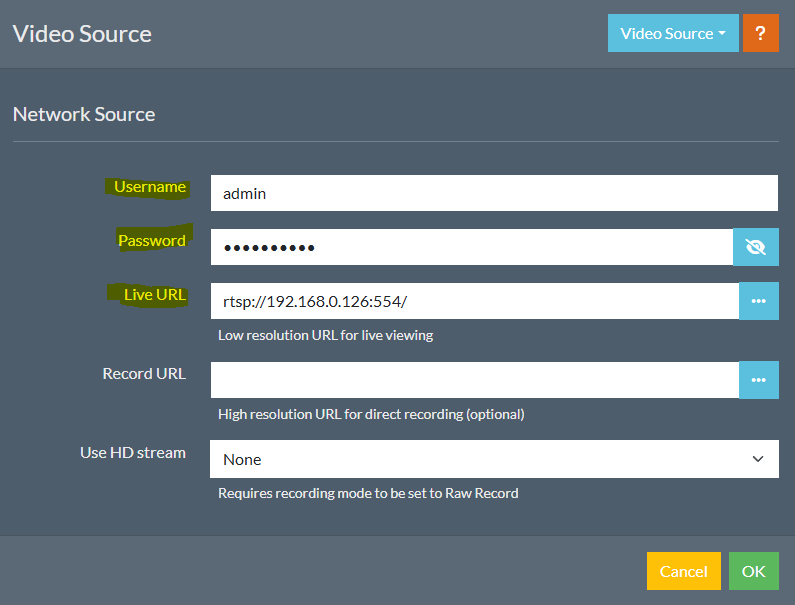
Network Source — RTSP URL & Credentials
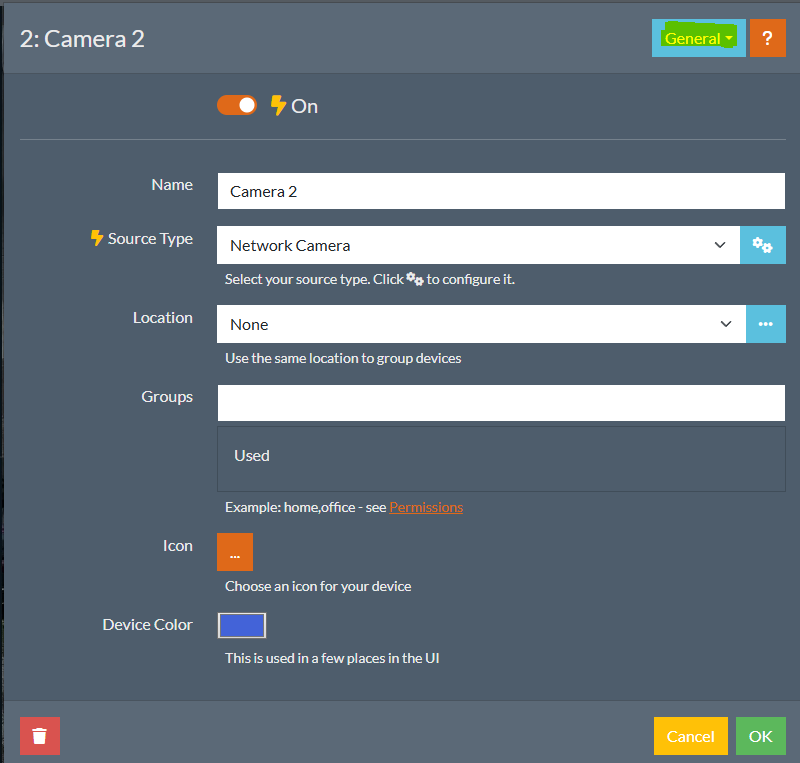
Recording Tab
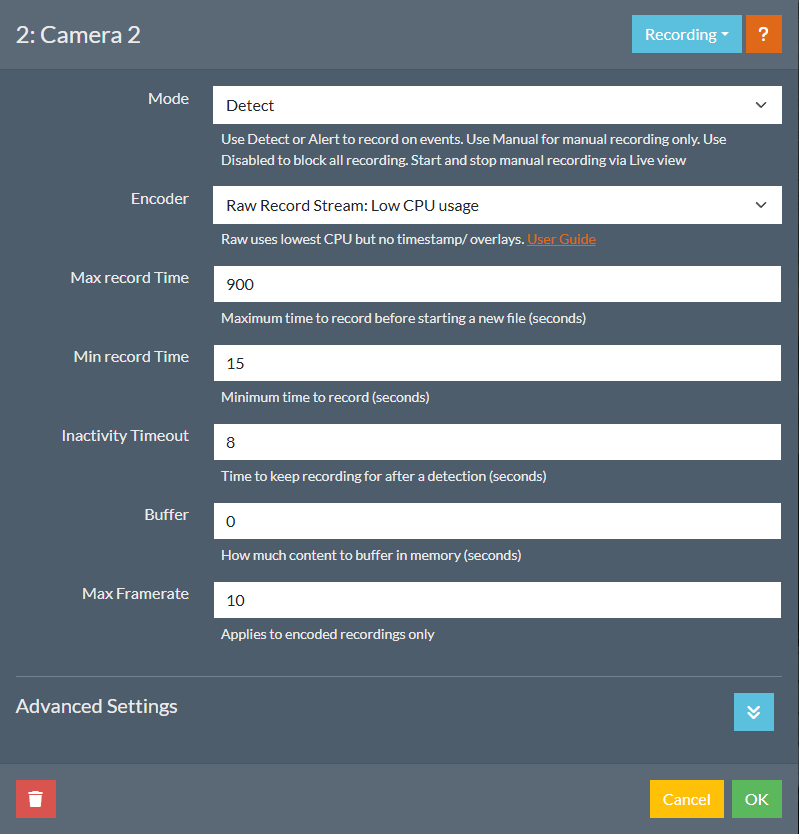
Recording Modes & Raw Encoding
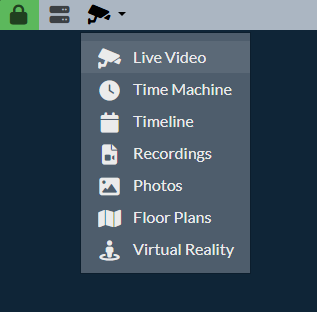
Camera Dropdown — Select Recordings
Conclusion
Congratulations! You have successfully established a robust, private, and subscription-free DIY Home Security system. By leveraging tools like iSpy alongside affordable Tapo cameras, you gain unrestricted access to your Local Security Footage while ensuring your network remains secure and responsive.